


Installing a 4 core copper armoured power cable in a cable trench is a crucial process that requires careful planning, proper tools, and adherence to safety standards. As a trusted supplier of 4 core copper armoured power cables, I understand the importance of providing high - quality products and sharing expert knowledge to ensure a successful installation. In this blog, I'll guide you through the step - by - step process of installing a 4 core copper armoured power cable in a cable trench.
Step 1: Planning and Preparation
Before starting the installation, it is essential to conduct a thorough planning phase. First, assess the route of the cable trench. The trench should be straight and free from any sharp objects or debris that could damage the cable. Measure the length of the trench accurately to determine the required cable length. Make sure to add some extra length (usually about 5 - 10% of the total length) to account for any bends or connections.
Next, check the specifications of the 4 core copper armoured power cable. Ensure that the cable has the appropriate voltage rating, current - carrying capacity, and insulation type for the intended application. Our company offers a wide range of 4 core copper armoured power cables, each designed to meet different industrial and commercial requirements. You can also explore other types of cables on our website, such as Low Smoke Halogen Free Multicore XLPE Cable and Flame - retardant Flexible Core Cable.
Gather all the necessary tools and equipment. This includes cable pulling equipment (such as winches or cable pullers), cable rollers, cable cutters, crimping tools, and safety gear (e.g., gloves, safety glasses, and hard hats).
Step 2: Cable Trench Preparation
The cable trench should be dug to the appropriate depth and width. The depth typically ranges from 0.7 to 1 meter, depending on local regulations and the type of soil. The width should be sufficient to accommodate the cable and allow for easy installation and future maintenance.
Line the bottom of the trench with a layer of sand or a soft, non - abrasive material. This layer acts as a cushion to protect the cable from sharp rocks or uneven surfaces. The sand layer should be about 100 - 150 mm thick.
Step 3: Cable Installation
Unroll the 4 core copper armoured power cable carefully. Start at one end of the trench and use cable rollers to guide the cable along the trench. The rollers help to reduce friction and prevent damage to the cable during the pulling process.
If the cable is long, you may need to use a winch or cable puller to pull the cable through the trench. Attach the cable to the pulling device using appropriate connectors. Make sure that the pulling force is evenly distributed along the cable to avoid excessive stress on any part of the cable.
As the cable is being pulled, periodically check the cable for any signs of damage. Look for cuts, abrasions, or kinks in the cable sheath or armour. If any damage is detected, stop the pulling process immediately and repair or replace the damaged section of the cable.
Once the cable is in place, secure it at regular intervals along the trench. You can use cable clamps or straps to hold the cable in position. Make sure that the cable is not under excessive tension and has some slack to allow for thermal expansion and contraction.
Step 4: Cable Termination
Cable termination is a critical step in the installation process. It involves connecting the cable to the electrical equipment or other cables. First, strip the outer sheath and armour of the cable at the termination points. Use cable cutters to carefully remove the appropriate length of the sheath and armour, exposing the inner cores.
Next, strip the insulation from the individual cores. Make sure to strip the insulation to the correct length as specified by the cable manufacturer. Use a crimping tool to attach the appropriate connectors (such as lugs or terminals) to the cores. Ensure that the connections are tight and secure to prevent electrical faults.
After connecting the cores, install the cable gland at the termination point. The cable gland provides a seal to prevent moisture, dust, and other contaminants from entering the cable. Tighten the cable gland according to the manufacturer's instructions.
Step 5: Testing and Commissioning
Once the cable is installed and terminated, it is essential to conduct a series of tests to ensure its proper functioning. First, perform a visual inspection of the cable and its connections. Check for any loose connections, damaged insulation, or other visible defects.

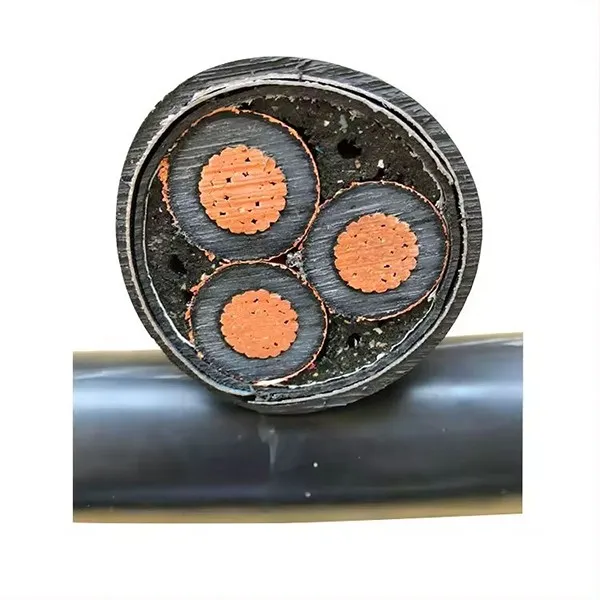
Then, conduct electrical tests, such as insulation resistance testing and continuity testing. Insulation resistance testing measures the resistance of the cable insulation to the flow of electrical current. Continuity testing checks if there is a continuous electrical path through the cable cores.
If the cable passes all the tests, it can be commissioned for use. However, if any issues are detected during the testing process, they must be resolved before the cable is energized.
Step 6: Backfilling and Restoration
After the cable has been tested and commissioned, backfill the cable trench. First, cover the cable with another layer of sand or soft material, about 100 - 150 mm thick. This layer further protects the cable from damage during the backfilling process.
Then, fill the remaining part of the trench with the excavated soil. Compact the soil in layers to ensure stability. Finally, restore the surface of the area above the trench, such as paving or landscaping, to its original condition.
Conclusion
Installing a 4 core copper armoured power cable in a cable trench is a complex but achievable task. By following the steps outlined in this blog, you can ensure a safe and successful installation. At our company, we are committed to providing high - quality 4 core copper armoured power cables and other related products, such as Aluminium PVC Insulated PVC Sheath Armoured Cable.
If you are interested in purchasing our cables or have any questions about cable installation, we encourage you to contact us for further discussion. Our team of experts is ready to assist you with your specific requirements and provide professional advice.
References
- Electrical Installation Guide, IEC (International Electrotechnical Commission)
- Cable Installation Handbook, Manufacturers' Association of Electrical Equipment


