


Hey there! As a supplier of power cable jointing accessories, I'm super excited to share with you how to install these accessories on cross - linked polyethylene (XLPE) cables. It's a process that might seem a bit daunting at first, but with the right steps and our top - notch products, you'll be able to do it like a pro.
1. Preparation
Before you even start thinking about installing the cable jointing accessories, you need to get everything ready. First off, gather all the necessary tools. You'll need a cable cutter, a wire stripper, a heat gun, and some measuring tools like a tape measure. Make sure these tools are in good condition and suitable for the job.
Next, inspect the XLPE cables. Check for any visible damage, such as cuts or abrasions on the cable insulation. If you find any, it's best to replace the damaged part of the cable before proceeding. Also, measure the length of the cables to ensure that you have enough space to install the jointing accessories properly.
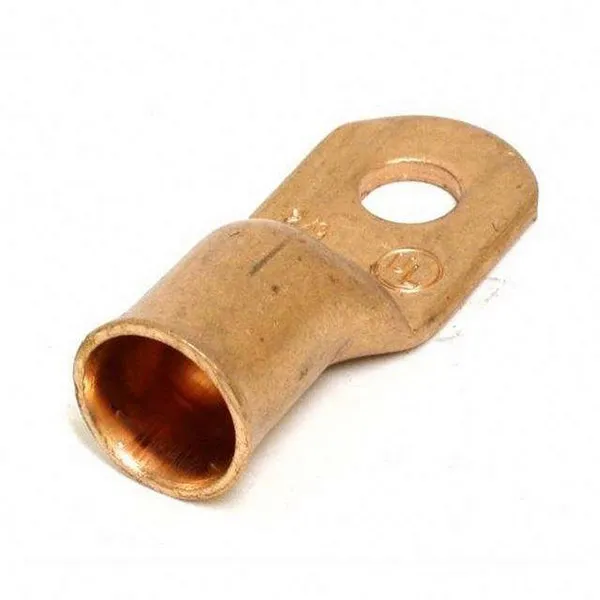
Now, let's talk about the accessories themselves. We offer a wide range of high - quality power cable jointing accessories. For example, our Tinned Plated Copper Aluminum Terminal Wire Copper Lugs are designed to provide a secure and reliable connection between the cables and other electrical components. These lugs are made from high - grade materials and are tinned to prevent corrosion.
2. Cable Stripping
Once you've got everything prepared, it's time to start stripping the cables. Use the wire stripper to remove the outer sheath of the XLPE cable. Be careful not to damage the inner insulation. You want to expose just the right amount of the conductor. Usually, you'll need to strip about 100 - 150 mm of the outer sheath, depending on the type of jointing accessory you're using.
After removing the outer sheath, you'll see the insulation layer. You may need to strip a small portion of this insulation as well to expose the conductor. Again, use the wire stripper carefully. Make sure the exposed conductor is clean and free from any debris. You can use a clean cloth to wipe it down if necessary.
3. Installing the Terminal Lugs
Now that the cables are stripped, it's time to install the terminal lugs. Take the Tinned Plated Copper Aluminum Terminal Wire Copper Lugs and insert the exposed conductor into the lug. Make sure it fits snugly. You can use a crimping tool to crimp the lug onto the conductor. Apply enough pressure to ensure a good connection, but don't over - crimp, as this can damage the conductor.
Once the lug is crimped onto the conductor, you can check the connection. You can use a multimeter to measure the resistance. A low resistance value indicates a good connection. If the resistance is too high, you may need to re - crimp the lug.
4. Applying Heat Shrinkable Accessories
Heat shrinkable accessories are an important part of the cable jointing process. Our Heat Shrink Termination Heat Shrinkable Joints are designed to provide insulation and protection for the cable joints.
First, slide the heat shrinkable accessory over the cable joint. Make sure it covers the entire joint area, including the terminal lugs. Position it carefully so that it's centered and there are no wrinkles or gaps.
Now, use the heat gun to apply heat to the heat shrinkable accessory. Start from one end and work your way to the other. Move the heat gun in a circular motion to ensure even heating. As the accessory heats up, it will shrink and conform to the shape of the cable joint. Keep applying heat until the accessory is fully shrunk and tightly sealed around the joint.

5. Sealing with End Caps
To provide additional protection, you can use Heat Shrinkable End Cap for Cable Termination. Slide the end cap over the end of the cable and position it so that it covers the exposed part of the cable and the joint.
Again, use the heat gun to apply heat to the end cap. Heat it evenly until it shrinks and forms a tight seal. This will prevent moisture and dust from entering the cable joint, which can cause damage over time.
6. Testing
After installing all the jointing accessories, it's crucial to test the cable joint. You can use a cable tester to check for continuity and insulation resistance. A good cable joint should have low resistance and high insulation resistance.
If the test results are not satisfactory, you may need to check the installation process again. Look for any loose connections, damaged accessories, or improper heat shrinking. Make the necessary adjustments and retest the joint until it passes the test.
7. Final Checks
Once the cable joint has passed the test, do a final visual check. Make sure all the accessories are properly installed and there are no signs of damage or loose parts. Check the heat - shrunk areas to ensure they are smooth and tightly sealed.
If everything looks good, your cable joint is now ready to be used. It's important to note that proper installation of power cable jointing accessories is essential for the safety and reliability of your electrical system.
Why Choose Our Accessories
We take pride in offering high - quality power cable jointing accessories. Our products are designed and manufactured to meet the highest industry standards. We use the best materials and the latest manufacturing techniques to ensure that our accessories are durable, reliable, and easy to install.
Whether you're working on a small residential project or a large industrial installation, our range of accessories has got you covered. We also offer excellent customer support. If you have any questions or need help with the installation process, our team of experts is always ready to assist you.
Contact Us for Purchase
If you're interested in purchasing our power cable jointing accessories, we'd love to hear from you. We offer competitive prices and fast delivery. Whether you need a single item or a large quantity for your project, we can meet your needs. Just reach out to us, and we'll be happy to discuss your requirements and provide you with a quote. Let's work together to ensure the success of your electrical projects!
References
- Electrical Installation Handbook, Schneider Electric
- Cable Jointing and Termination Manual, 3M


