Hey there! I'm a supplier of cable fittings, and I know how frustrating it can be when you run into damaged cable fittings. But don't worry, I'm here to walk you through the process of repairing them.
First off, let's talk about why cable fittings get damaged in the first place. There are a bunch of reasons. Sometimes it's due to physical stress, like when the cables are bent too much or pulled hard. Environmental factors can also play a role. Exposure to extreme temperatures, moisture, or chemicals can weaken the fittings over time. And let's not forget about wear and tear from regular use.
Before you start any repair work, it's super important to assess the damage. Take a close look at the fitting. Is it just a minor scratch, or is there a more serious issue like a crack or a broken part? You might need to use some tools, like a magnifying glass, to get a better look. If the damage is really bad, it might be safer to just replace the fitting. But if it's a minor problem, you can probably fix it.
Now, let's get into the actual repair process. The steps can vary depending on the type of cable fitting you're dealing with.
Heat Shrink Termination and Heat Shrinkable Joints
These are pretty common types of cable fittings. If you're dealing with damaged Heat Shrink Termination Heat Shrinkable Joints, here's what you can do.

First, make sure you have all the necessary tools and materials. You'll need a heat gun, replacement heat shrink tubing, and some cable ties. Start by carefully removing the damaged heat shrink tubing. Be gentle so you don't damage the cable underneath. Once the old tubing is off, clean the area around the cable to get rid of any dirt or debris.
Next, cut a piece of new heat shrink tubing to the right length. Slide it over the cable and position it where the old tubing was. Use the heat gun to apply heat evenly to the tubing. Move the heat gun around slowly to make sure the tubing shrinks uniformly. As it shrinks, it will form a tight seal around the cable. Once it's fully shrunk, use cable ties to secure the ends if needed.
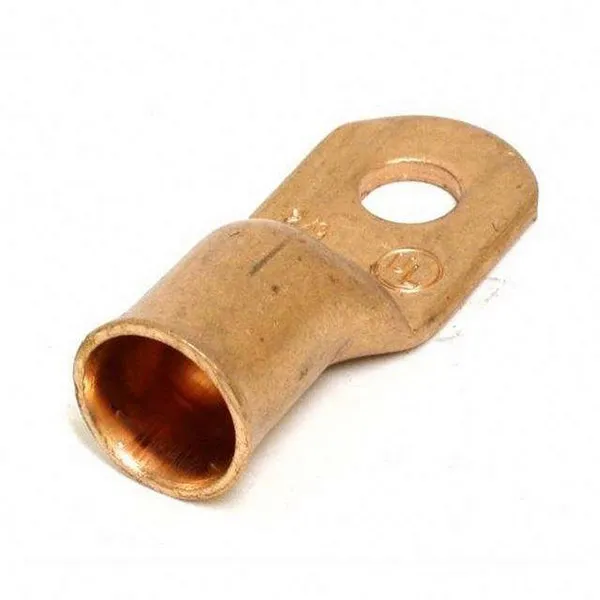
Copper Tube Terminal Lugs and Splices
Copper Tube Terminal Lugs Splices Ring Terminal are another type of cable fitting that can get damaged. If you notice a crack or a loose connection in a copper tube terminal lug, you can try to repair it.
First, disconnect the cable from the power source to be safe. Then, use a pair of pliers to remove any nuts or bolts holding the lug in place. Carefully inspect the lug for damage. If it's just a small crack, you can use a conductive epoxy to fill it. Make sure to clean the area around the crack before applying the epoxy.
Once the epoxy is dry, reattach the lug to the cable. Use the appropriate size of nuts and bolts and tighten them securely. Check the connection to make sure it's tight and there's no loose movement.
Tinned Plated Copper Aluminum Terminal Wire and Copper Lugs
For Tinned Plated Copper Aluminum Terminal Wire Copper Lugs, the repair process is a bit different. If the plating on the terminal is damaged, it can affect the conductivity.
Start by cleaning the terminal with a wire brush to remove any oxidation or dirt. If the damage is minor, you can try to re - tin the terminal. Heat up a soldering iron and apply a small amount of solder to the damaged area. Make sure the solder spreads evenly over the surface.
If the terminal is severely damaged, you might need to replace it. Remove the old terminal from the wire using wire cutters or pliers. Then, select a new terminal that matches the size and type of the old one. Slide the new terminal onto the wire and crimp it using a crimping tool. Make sure the crimp is tight to ensure a good connection.
During the repair process, there are a few safety tips you should keep in mind. Always wear safety glasses to protect your eyes from any flying debris. When using a heat gun or a soldering iron, be careful not to burn yourself. And of course, always disconnect the power source before working on any cable fittings to avoid electrical shock.
After you've completed the repair, it's a good idea to test the cable fitting. You can use a multimeter to check the conductivity and make sure there are no short circuits. If everything checks out, you're good to go.
If you're not confident in your repair skills or if you're dealing with a complex problem, it might be a good idea to consult a professional. But in many cases, you can save time and money by doing the repairs yourself.
As a cable fitting supplier, I know how important it is to have reliable cable fittings. If you're in the market for new cable fittings or if you have any questions about the repair process, feel free to reach out. We have a wide range of high - quality cable fittings to meet your needs. Whether you need heat shrink termination, copper tube terminal lugs, or tinned plated copper aluminum terminals, we've got you covered. Contact us to start a procurement discussion and find the best solutions for your cable fitting requirements.
References
- Electrical Installation Handbook by Schneider Electric
- Cable Fitting Manuals from various manufacturers


