Hey there! I'm a supplier of wall switches and electrical accessories, and today I'm gonna walk you through how to install a multi - gang wall switch. It might seem a bit daunting at first, but with the right steps and a bit of know - how, you'll have that switch up and running in no time.
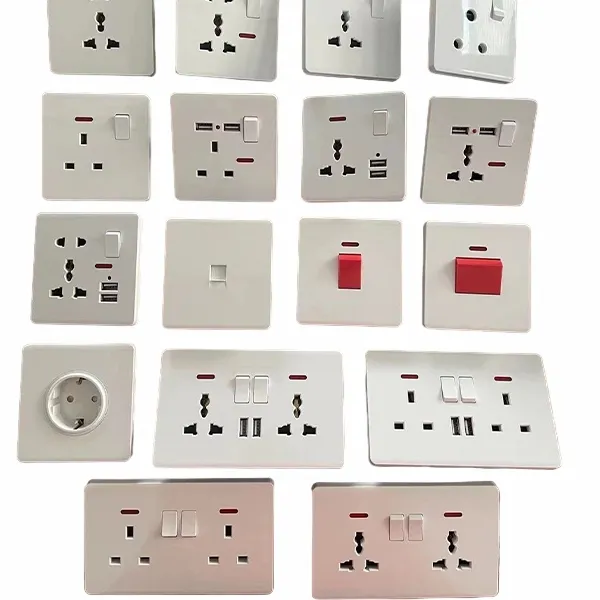

Why Choose a Multi - Gang Wall Switch?
Before we jump into the installation process, let's talk about why a multi - gang wall switch is a great choice. These switches allow you to control multiple lights or electrical devices from a single location. It's super convenient, especially in large rooms or areas where you have different lighting setups. Plus, they can really streamline your home's electrical control system. And of course, as a supplier of Wall Switch and Electrical Accessories, I can tell you that we've got a wide range of multi - gang switches to suit different needs and styles.
Tools and Materials You'll Need
First things first, gather all the tools and materials you'll need for the installation. Here's a quick list:
- Screwdriver set: You'll need both flat - head and Phillips - head screwdrivers. Different switches and electrical boxes might have different types of screws, so having a set is a must.
- Wire strippers: These are used to remove the insulation from the electrical wires. Make sure they're sharp and in good condition.
- Voltage tester: This is crucial for your safety. It helps you determine if the power is off before you start working on the electrical connections.
- Multi - gang wall switch: Pick the one that fits your requirements. You can check out our selection of Wall Switch and Electrical Accessories for some great options.
- Electrical tape: Use it to insulate the wire connections and prevent any short - circuits.
- Mounting screws: Usually, the switch comes with these, but it's a good idea to have some extras on hand.
Safety First
Safety is always the top priority when dealing with electricity. Here are some safety tips:
- Turn off the power: Locate the circuit breaker that controls the area where you'll be installing the switch. Flip it to the “off” position. Then, use a voltage tester to double - check that the power is indeed off. You don't want to get a nasty shock!
- Wear protective gear: Rubber gloves and safety glasses can protect you from any potential electrical hazards.
- Work in a dry area: Water and electricity don't mix. Make sure the area around the installation site is dry.
Step - by - Step Installation Process
Step 1: Remove the Old Switch
If you're replacing an existing switch, start by removing the cover plate. Use a screwdriver to loosen the screws holding the cover plate in place and gently pull it off. Next, remove the screws that hold the switch to the electrical box. Carefully pull the switch out of the box, but be careful not to tug on the wires too hard.
Step 2: Identify the Wires
Once the switch is out, you'll see a bunch of wires. There are usually three types of wires: the hot wire (usually black or red), the neutral wire (usually white), and the ground wire (usually green or bare copper). The hot wire carries the electrical current, the neutral wire completes the circuit, and the ground wire provides a safety path in case of a short - circuit.
Step 3: Prepare the Wires
Use the wire strippers to remove about 3/4 inch of insulation from the ends of the wires. Be careful not to cut into the wire itself. If the wires are a bit frayed, you can trim them to get a clean end.
Step 4: Connect the Wires to the New Switch
Now it's time to connect the wires to the new multi - gang switch. The switch will have terminals labeled for each type of wire. Connect the hot wire to the appropriate terminal on the switch. Some switches might have multiple hot wire terminals if they're controlling multiple circuits. Connect the neutral wire to the neutral terminal (if applicable). And don't forget to connect the ground wire to the ground terminal on the switch.
Step 5: Secure the Switch to the Electrical Box
Once the wires are connected, carefully tuck them back into the electrical box. Make sure the wires are neatly arranged and not twisted or pinched. Then, use the mounting screws to attach the switch to the electrical box. Tighten the screws just enough to hold the switch securely in place.
Step 6: Install the Cover Plate
After the switch is mounted, put the cover plate back on. Align the holes in the cover plate with the screws on the switch and use a screwdriver to tighten the screws.
Step 7: Turn the Power Back On
Once everything is installed and you're sure all the connections are secure, go back to the circuit breaker and turn the power back on. Test the switch to make sure all the lights or devices it controls are working properly.
Additional Tips and Considerations
- Label the switches: If your multi - gang switch controls different lights or devices, it's a good idea to label the switches so you know which one controls what. You can use small stickers or a label maker.
- Check for proper grounding: A proper ground connection is essential for safety. If you're not sure how to connect the ground wire correctly, it might be a good idea to consult a professional electrician.
- Use high - quality materials: As a supplier of Wall Switch and Electrical Accessories, I can't stress enough the importance of using high - quality switches and wires. It'll ensure the long - term reliability and safety of your electrical system.
Other Related Electrical Accessories
In addition to multi - gang wall switches, we also offer a range of other electrical accessories. For example, Heat Shrink Termination Heat Shrinkable Joints are great for protecting and insulating cable connections. And if you need Tinned Plated Copper Aluminum Terminal Wire Copper Lugs, we've got those too. These accessories can complement your multi - gang switch installation and help you create a more robust electrical system.
Wrapping Up and Contact for Purchase
Well, that's how you install a multi - gang wall switch. I hope this guide has been helpful to you. If you're interested in purchasing multi - gang wall switches or any of our other Wall Switch and Electrical Accessories, feel free to reach out for a purchase and negotiation. We're here to help you find the right products for your needs.
References
- Electrical Installation Manuals
- National Electrical Code Guidelines