The installation process of power cable jointing accessories is a critical procedure that demands precision, expertise, and adherence to safety standards. As a reliable supplier of power cable jointing accessories, we understand the significance of a proper installation to ensure the long - term performance and safety of electrical systems. In this blog, we will delve into the step - by - step installation process of these essential accessories.
Pre - installation Preparations
Before starting the installation of power cable jointing accessories, a series of preparatory steps are necessary. First and foremost, a thorough inspection of the cables and accessories is required. Check the cables for any physical damage, such as cuts, abrasions, or signs of aging. Ensure that the cable insulation resistance meets the specified standards.
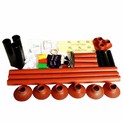
For the power cable jointing accessories, verify their type, size, and compatibility with the cables. We offer a wide range of high - quality accessories, including Tinned Plated Copper Aluminum Terminal Wire Copper Lugs and Wire Square Tube Cable Terminal Set. These products are designed to meet diverse installation requirements.
Next, gather all the necessary tools for the installation. Common tools include cable cutters, strippers, crimping tools, insulation testers, and heat guns. Make sure the tools are in good working condition and are appropriate for the size and type of cables and accessories being used.
It is also crucial to create a clean and safe work environment. Remove any debris, dust, or moisture from the installation area. If possible, set up a temporary shelter to protect the work from adverse weather conditions.
Cable Preparation
The first step in the actual installation process is cable preparation. Start by measuring and marking the cables at the desired jointing or termination points. Use a cable cutter to make a clean cut at the marked location. Ensure that the cut is perpendicular to the cable axis to avoid any uneven surfaces.
After cutting the cable, strip the outer sheath and insulation layers carefully. The length of the stripping depends on the type of accessory being installed. For example, when using Heat Shrink Termination Heat Shrinkable Joints, the stripping length should be in accordance with the manufacturer's instructions.
Once the insulation is stripped, clean the exposed conductors to remove any oxidation or contaminants. This can be done using a suitable cleaning agent and a soft brush. After cleaning, dry the conductors thoroughly to prevent any electrical conductivity issues.
Installation of Terminal Lugs or Connectors
If terminal lugs or connectors are part of the installation, select the appropriate size and type based on the cable conductor size and the application requirements. Place the terminal lug or connector over the stripped conductor.
Use a crimping tool to compress the terminal onto the conductor. Apply the correct amount of force to ensure a tight and secure connection. The crimping process should be carried out in accordance with the manufacturer's specifications. Over - crimping or under - crimping can lead to poor electrical conductivity and mechanical strength.
After crimping, inspect the connection visually. Check for any signs of deformation or improper seating of the terminal. Use an insulation tester to verify the electrical continuity of the connection.
Installation of Insulation Accessories
For insulation purposes, heat - shrinkable tubes or other insulation materials are commonly used. Slide the heat - shrinkable tube over the cable and the terminal connection. Make sure the tube covers the entire exposed area.
Use a heat gun to apply heat evenly to the heat - shrinkable tube. Start from one end and move the heat gun slowly towards the other end. The heat causes the tube to shrink and conform tightly to the cable and the terminal.
During the heating process, be careful not to overheat the tube, as this can cause damage to the insulation material. Follow the recommended temperature and heating time provided by the manufacturer.


Testing and Quality Assurance
After the installation of all the accessories, conduct a series of tests to ensure the quality and safety of the installation. First, perform an insulation resistance test using an insulation tester. This test measures the resistance of the cable insulation and helps to detect any insulation defects.
Next, conduct a voltage withstand test. Apply a specified voltage to the cable and accessories for a certain period of time. Monitor the system for any signs of electrical breakdown or leakage.
Inspect the installation for any physical defects, such as loose connections, damaged insulation, or improper fitting of accessories. Make any necessary adjustments or repairs before putting the system into operation.
Maintenance and Follow - up
Even after a successful installation, regular maintenance is essential to ensure the long - term performance of the power cable jointing accessories. Schedule periodic inspections to check for any signs of wear, aging, or damage.
Keep a record of the installation and testing results. This documentation can be useful for future reference and troubleshooting. If any issues are detected during the maintenance process, contact a professional technician or the supplier for assistance.
Conclusion
The installation process of power cable jointing accessories is a complex but crucial task. By following the proper steps and using high - quality accessories, you can ensure the reliability and safety of your electrical systems. As a leading supplier of power cable jointing accessories, we are committed to providing you with the best products and technical support.
If you are interested in our power cable jointing accessories or need further information about the installation process, please feel free to contact us for procurement and negotiation. We look forward to working with you to meet your electrical needs.
References
- Electrical Installation Handbook, various editions
- Manufacturer's instructions for power cable jointing accessories
- Industry standards for electrical cable installations (e.g., IEC standards)